Tying a Tie for a Standard Collar: A Step-by-Step Guide
Tying a tie for a standard collar can seem intimidating, but with the right techniques and practice, anyone can master the art of tying a tie. In this article, we'll provide a comprehensive guide on how to tie a tie for a standard collar, including the different types of knots and how to adjust the tie to fit your collar perfectly.The Basics of Tying a Tie
Before we dive into the specifics of tying a tie for a standard collar, it's essential to understand the basic steps involved in tying a tie. The process involves creating a knot by wrapping the tie around the collar and then tightening it to secure it in place.Choosing the Right Tie Knot
There are several types of tie knots that you can use for a standard collar, including the Four-in-Hand knot, the Half Windsor knot, and the Windsor knot. Each knot has its own unique characteristics and is best suited for specific types of collars and occasions.The Four-in-Hand Knot
The Four-in-Hand knot is one of the most common tie knots and is suitable for standard collars. This knot is easy to tie and creates a relatively small knot that is perfect for casual wear.The Half Windsor Knot

As we can see from the illustration, Tying A Tie For A Standard Collar has many fascinating aspects to explore.
The Half Windsor knot is a variation of the Windsor knot and is best suited for standard collars. This knot is slightly larger than the Four-in-Hand knot and is ideal for formal occasions.The Windsor Knot
The Windsor knot is a wide and symmetrical knot that is perfect for standard collars. This knot is ideal for formal occasions and creates a sharp and elegant look.Tying a Tie for a Standard Collar
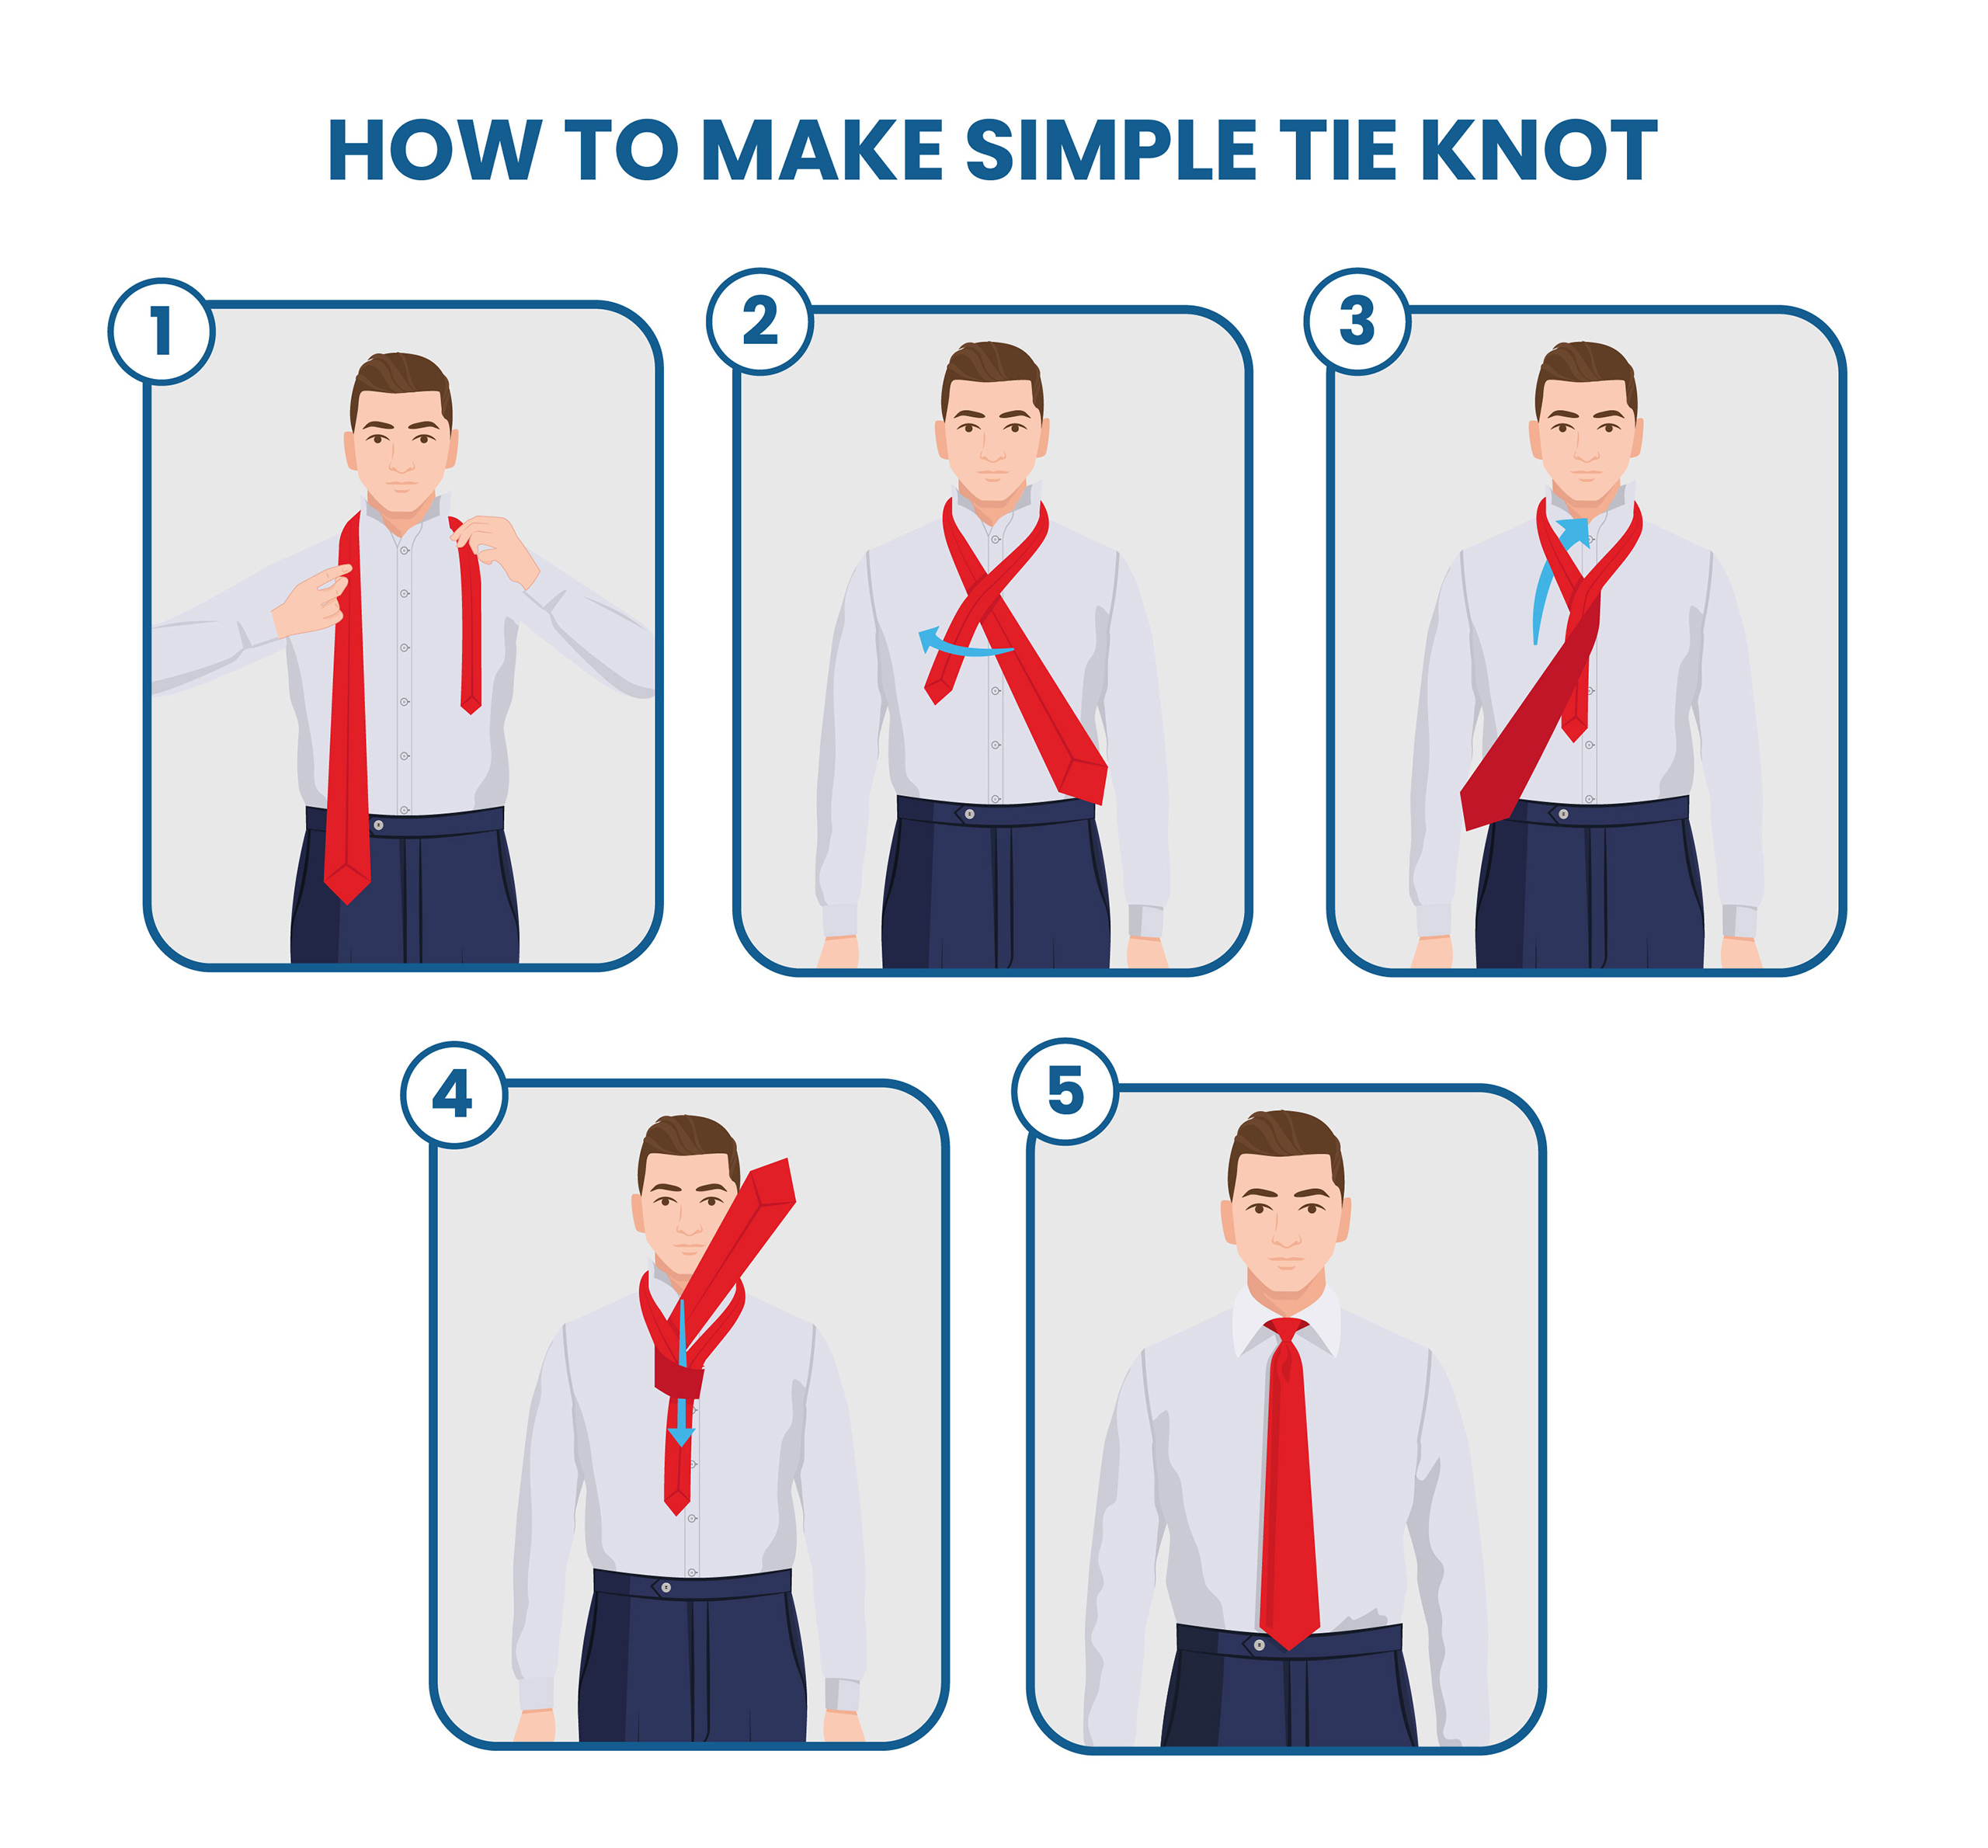
To tie a tie for a standard collar, follow these steps:Step 1: Begin with the Tie
Start by holding the tie in front of you with the wide end on your left side and the narrow end on your right side.Step 2: Loop the Tie Around the Collar

As we can see from the illustration, Tying A Tie For A Standard Collar has many fascinating aspects to explore.
Cross the wide end over the narrow end and loop the tie around the collar, so that the wide end is on your left side and the narrow end is on your right side.Step 3: Create the Knot
Bring the wide end under the narrow end and then over the top of the knot, so that it forms a loop. Take the wide end and pass it through the loop you just created.Step 4: Tighten the Knot
Pull the wide end gently to tighten the knot. Adjust the tie so that it is centered and the knot is snug against the collar.Step 5: Adjust the Dimple
The dimple is a small indentation just beneath the knot that adds depth and texture to the tie. To create a dimple, gently pinch the tie with your thumb and index finger and then release it.Adjusting the Tie for a Standard Collar
Moving forward, it's essential to keep these visual contexts in mind when discussing Tying A Tie For A Standard Collar.
To adjust the tie for a standard collar, follow these steps:


")


